Protecting Your Intellectual Property…

It drives me nuts when magicians complain about magic tricks being “knocked off” or “stolen”, but they didn’t take the most basic steps to protect them. It doesn’t take much to register a copyright on the art and instruction for whatever trick you are putting out.

Before you say it, I’m aware that in the USA your work is “copyrighted” the second you create it. The issue is that you can’t enforce that copyright without a registration number. Sure, you can send a “cease and desist” letter, but without a copyright registration, you really can’t legally enforce it.

Magician’s love to say that “show business” is two words and the business is important. It is, and it’s time for magicians to actually look into the business part when releasing tricks. If they did what businesses do and legally protect their intellectual property it really wouldn’t be an ethical issue. It’s pretty cut and dry.

It’s a business decision to not patent a trick that you are releasing due to the cost or time it takes to get a patent. That’s fine, but you have to live with that decision.

out for beers magic trick

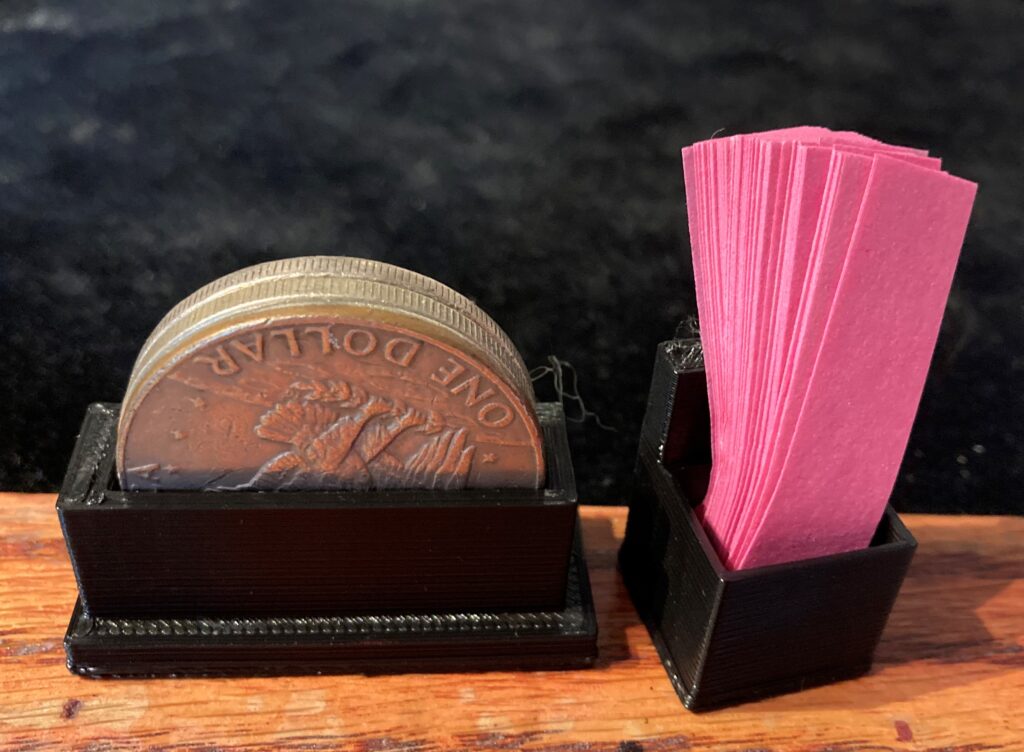
Recently I put out a trick called Out For Beers. This trick uses an original visual gag combined with the Out To Lunch Principle. I really like the gag, and wanted to protect it as it’s something that would be easy to knock off. For $65 in filing fees, I was able to copyright the gag. I’ve copyrighted stuff in the past, and it’s always taken 6-9 months, however somehow I got lucky and this one was process in less than a month!

copyright magic trick

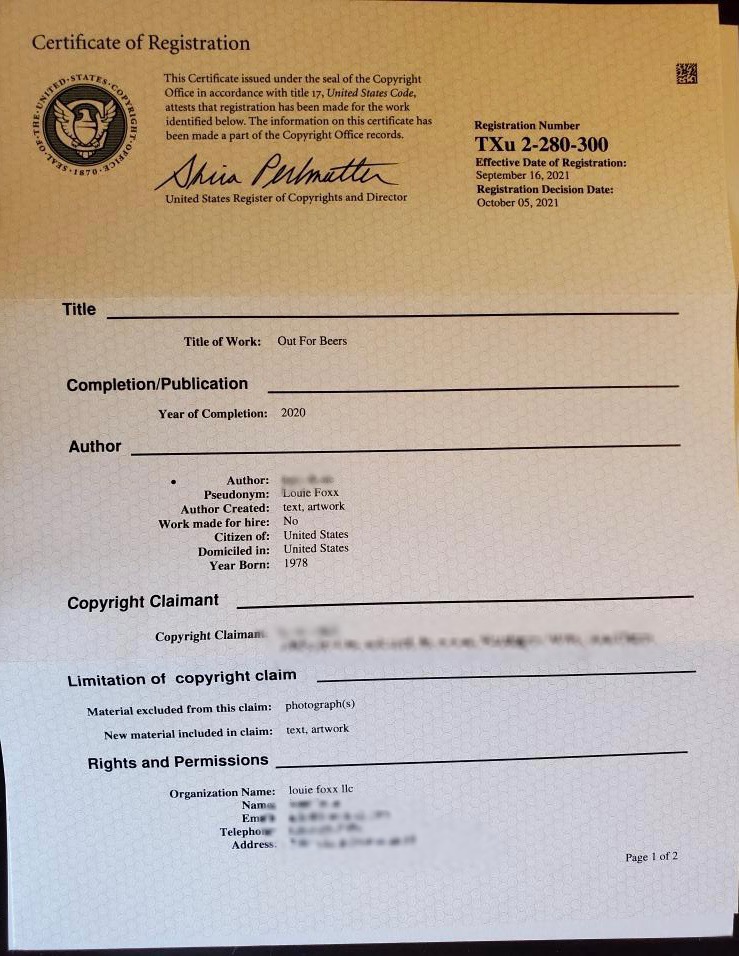
What this certificate and registration number does is allow me to quickly force sites like Ebay or AliExpress to remove the knock off or unauthorized version of the trick from their websites. This doesn’t guarantee that my stuff won’t get knocked off, but it’s gives me a tool to fight people who are knocking off my stuff!

Table Top Prop Management…

When it comes to prop management, I’m not the best, but I do have a system. All of my hand held props are in a bin on my table. I don’t do any performing on the table top, it all happens in my hands, so the table simply holds my props. Here’s a peek into my table top bin:

magic table with thumb tips, media star remote controls, evaporation trick, and card tricks

As things get used they either go back into their space in the bin if the trick is instantly reset at the completion of the trick. If the trick doesn’t reset, it goes into my case which is to my left and holds a two larger props I use. This system works well for me when doing three shows a day at fairs. It makes it easy for me to assess what tricks need to be reset and make sure nothing gets missed.

I’m sure there are better systems. I know some two person acts have the “assistant” bring out each routine and then remove the props at the end of the routines. The advantage of that is the show is getting packed up while the show is happening. I’ve used this system in the past when I’ve performed with my daughter. It’s a really nice way to do it, but it’s not something in can do in 90% of my shows.

What’s probably the most important thing is that you have a system of some sort to try to eliminate or shorten dead time while getting or putting away props. Sometimes a joke or interesting patter can fill this time. Other instances, simply having a prop that’s easy to grab is the best option.

-Louie

Learning to Rock the Mic…

I’m still working through using a handheld microphone in the show. There’s definitely a learning curve. I’m getting better at it, but it’s an uphill slog. I have a lot of points where I’m holding the mic in my hand, then put it in the stand for a moment, only to quickly remove it.

Stage magic show

I really like how when I’m holding the mic in my hand, I’m a lot more expressive with my hands than when I’m wearing just a headset. I think holding the mic makes me more aware of what my hands are doing. It also puts a hand up near my face, so I can play more with motion that’s motivated.

As I get deeper into my show, I’m realizing that there’s going to be a lot of spaces where I’ll need to use the mic neck holder. That’s fine, I’ll need a joke to address it. Today I have to figure out how to do the reveal of the object in ball of yarn that’s the end of the longest routine in the show. I had to chunk this routine out into three bits to figure out the blocking, and today will be the third bit to figure out.

-Louie

Ugh…Still More Invisible Deck Work…

Phoenix large index cards
Regular card and a Phoenix Large Index card

Having a gig where I’m doing 66 shows at all month is a great opportunity to work on new material. I’m still working on my idea for the Invisible Deck. It’s coming along. I’m now using Phoenix Large Index Cards. The bigger index makes it play a row or two further back.

One thing I’m realizing is that this trick is going to be limited to the size of room it can play. I’m going to need to figure out a way to scale the trick back up to either a Phoenix Parlour sized deck or a jumbo deck. It’s interesting how the process works, I had to shrink the trick to figure out why I need to enlarge it!

So why not just go back to using the Vernet 52 B’Wave?

The main reason is the routine I was doing required 3 jumbo decks and didn’t really have a routine for it. By changing the method, I ended up finding a presentational hook for the trick, which ultimately helps the routine. Yes, I could do my routine with the 52 B’Wave, but now that’d bump it up to travelling with four jumbo decks, and that’s a lot of weight in case for a card trick!

I think the method may end up being some sort of hybrid method, where the reveal deck is similar to the 52 B’Wave deck, but with different reveal cards, and reveal cards that aren’t gimmicked, so they can be shown more freely.

Another reason I’m playing with a different method is that there’s a sense of pride I have when I perform with original methods.

Handheld Mics…

When I was first starting out performing in comedy clubs in the early 2000’s I had to use a wired handheld microphone. As I progress through my career, I switched to a wireless headset. I’m now playing with going back to being able to do my show with a wired handheld microphone. The main reason is that it’s logistically easy. I don’t need to travel with my own gear, and it also makes trying out new stuff and open mic’s much easier.

I’m performing all month doing three shows a day at a fair, and aside from working on some new material, I’m also trying to relearn to use a handheld microphone. My preshow right now is a stand up set of jokes, which runs about 7 minutes, and I’m now doing that all with the handheld mic. I’m still wearing my headset during this, but using the handheld.

I picked up Michael Kent’s video Microphone Management For Magicians and it’s a great resource! There’s a lot of good info on the video and totally worth the $49.95!

Right now my goal is every day to move the handheld one bit further into the show. Right now, I have my preshow stand up set, my two new “preshow” tricks and then first actual trick in the show all done with the handheld. The next routine is really three tricks in one routine. I was dreading figuring out how to add the handheld microphone to it as parts of it are pretty physical. Then it hit me, I need to look at it as three tricks, not one routine. Once I broke it down that way, it’s much easier to start figuring out how to do it with a handheld microphone.

Shure sm58s

I was chatting with the sound engineer at my stage about what microphone to get and he suggested the Shure SM58S. This is the version of the Shure SM58, but it has an on/off switch which is something I want. Right now if I’m jumping back and forth between the headset and the handheld, I need that switch so that I’m not being picked up by both mics.

If you’ve never used a handheld, I suggest you learn how, it’ll be helpful the one time your headset dies right before showtime.

-Louie

MisMade Bill Styles…

In my stage show I use a mismade bill that just has one seam of the bill on each side.

Most magician’s use the mismade bill that has two seams:

I think the single seam is easier to visually process from the audience and at a distance. I decided to do some testing at the fair that I’m performing at and I’m getting bigger reactions and faster reactions from the bill with a single seam than with two seams.

It’s such a small thing, and in many context’s you may want to use the two seam bill, like if you are tearing a bill into quarter, of course it makes sense to use the bill with two pieces. In my routine, I turn the bill inside out, so there’s no tearing.

The important thing is to try new things and see if maybe you can get a better reaction doing something slightly different.

-Louie

Still Working on the Invisible Deck…

It hit me yesterday while I was doing my version of the invisible deck was that my version is not about the card, it’s about the two cards matching. That’s a huge distinction when it comes to making it play big. If you’re performing on stage with the invisible deck, the audience needs to know it’s the card that was named. In my routine since it’s a prediction, they only need to know that the two cards match. That means they only need to be able to tell the cards look the same from the back of the audience.

To make it play bigger, but still use a normal size deck, I have a few options. I could use a jumbo index card, which I personally don’t like. I think they look funny. In the past for stage work, I’ve used GIANT INDEX cards. These are cards that don’t have the pips in the middle, they are more like flash cards. These also look funny, but I like they way the look more than Jumbo index cards. The final option is to use the Phoenix Large Index Cards. These are normal looking cards, but the pips and indexes are 50% larger.

I just ordered some of the large index cards. I’m going to make a gimmicked deck and give it a try when I’m back at the fair on Wednesday. I’m guessing it will play slightly better, I don’t think the difference will be huge, but better than how it’s been.

I also figured out the optimum number of cards to do the trick with. I need to do the trick with 16 pairs (32 total). That’s going to eliminate evenly from 32 to 16 to 8 to 4 to 2 to the final card. I’m hoping that 32 cards will still play like a full deck from the stage. We’ll find out…

-Louie

Writing For the Invisible Deck…

As I still keep working on my version of the Invisible Deck, I think I have the technical end worked out. The biggest challenge is the elimination process. I needed to figure out how to remove any confusion as to what side people are selecting. What I have settled on is having people point to a side of the room. If they point to my hands, I can’t tell which side they are pointing at. So having them point at the left or right wall clears that up.

Next up is figuring out the presentation. As I’ve been doing it, as the elimination process happens I’ve organically been saying, “that’s what I would have done”. I’m kinda using that as the base for the routine. Here’s what I wrote last night:
“Whenever I leave the house, my wife tells me to make good choices. I’m gonna tell you, I only make the best choices! Like the time I made my own penicillin from sour cream…or when I knitted my own seatbelt…or the time I went to Wyoming.”

It’s a starting point. Maybe I could say say their “choices are better than the time I…” and then say something funny. I think I’m not at a point where I just need to write and try out the jokes.

More Invisible Deck Work…

One of the tricks I’m working on right now at the fair is my version of the Invisible Deck…Well my version of Vernet’s 52 B’wave. The effect is a selected card is in a second deck face up, has a different colored back and the rest of the deck is blank.

Because of my method for the trick, I know what the selected card it without looking at the face. Yesterday I said the name of the card without looking at it and someone in the audience called me on it. I played it off as saying I did look, and they must not have noticed. I need to do an exaggerated look at the front of the card. I also need to do a streamlined elimination of the cards. Right now I’m splitting the cards in half and eliminating half at each split. I need to figure out the least number of splits. Like maybe doing it with a 45 or 48 card deck instead of a 52 card deck make it go a little bit faster?

I’m figuring out the beats and how to make it play better with the audience. After the first reveal of the card upside down, I’m flipping the card they chose over, saying they aren’t an exact match, as that’s from a blue deck and I’m holding a red deck. I then flip the card in the red deck over to show it has has a red back. The change from just saying, “and it has a different colored back” to explaining why it would have a different colored back is giving me a stronger reaction.

I’m liking how this plays better than the traditional invisible deck where they simply name a card. It involves a lot of people from the audience, and they can see the cards that they are making a choice of. While it’s dirtier than the traditional invisible deck method/effect, it also eliminates the top explanations on how the tricks works:

1. Everyone picks the _____
2. It was set up with the person in advance

While neither of those are how the traditional invisible deck works, you really can’t argue them.

Coins and Confetti…

At my gig this month, I’m really trying to streamline my show and what props I’m lugging around. I have way more stuff than I need in my table. However I also noticed that for the coin trick that I do, the coins right now lay in a stack on my table bin. I think it would be easier to have them in a vertical stack. They’ll take up less space and be easier to grab. I also am playing with a bit where I need to grab some confetti from my case. An easy way would be to have a little holder that attaches to the side of the case.

This is where 3D printing comes in handy. It took me about 5 minutes to design the two holders:

magic coin holder and magic confetti dropper

It took about an hour for the two holders to print, and I’m good to go! 5 minutes of active work and here’s what I ended up with:

It’s little things like this, that if I had to make from “found materials” it would have taken me more that five minutes to make. This is why I’m such a fan and suggest to everyone that they learn to 3D print!