Yesterday I took a quick break from performing on the fair circuit and did a senior show. This was a “monthly activity” for seniors at a retirement community. Most of these places need entertainment and host multiple entertainers a month to perform at things like monthly birthdays, holidays, etc.
If you’d like more info on performing senior shows check out my book How To Perform For Seniors which teaches you how to market and perform shows at these communities.
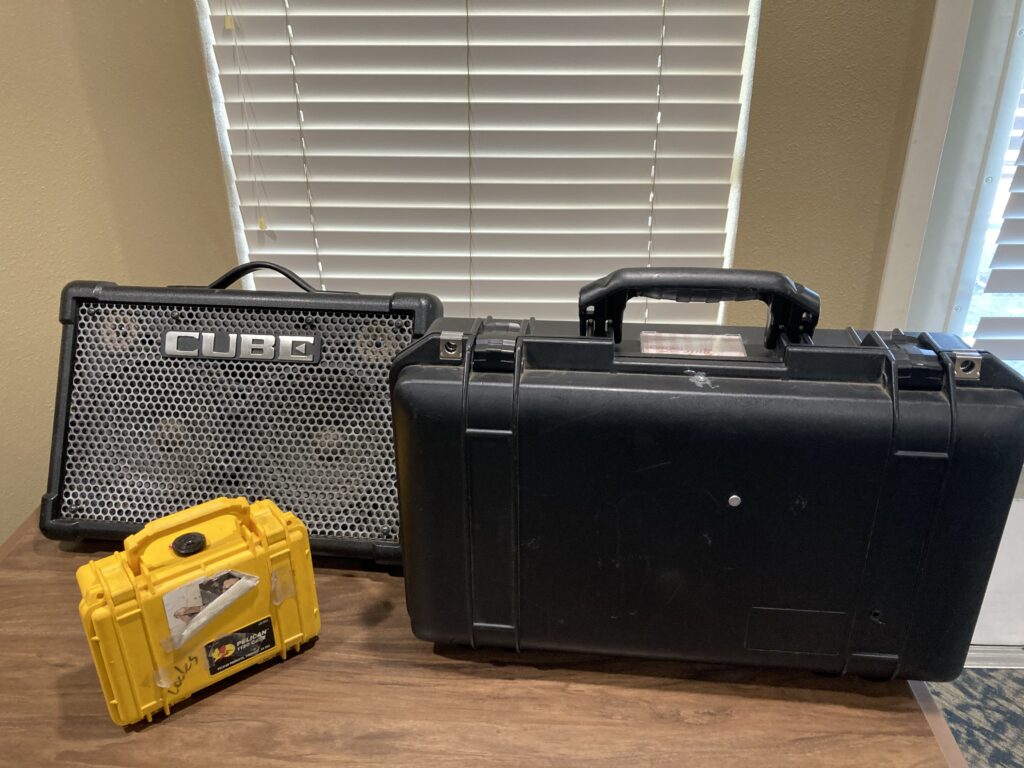
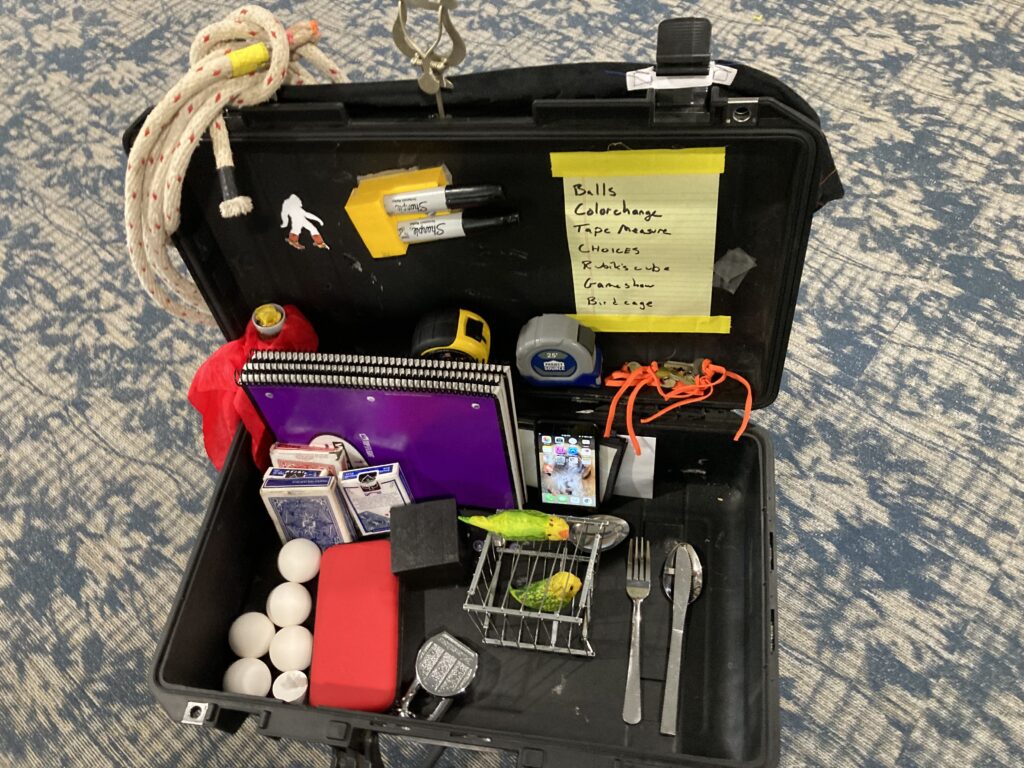
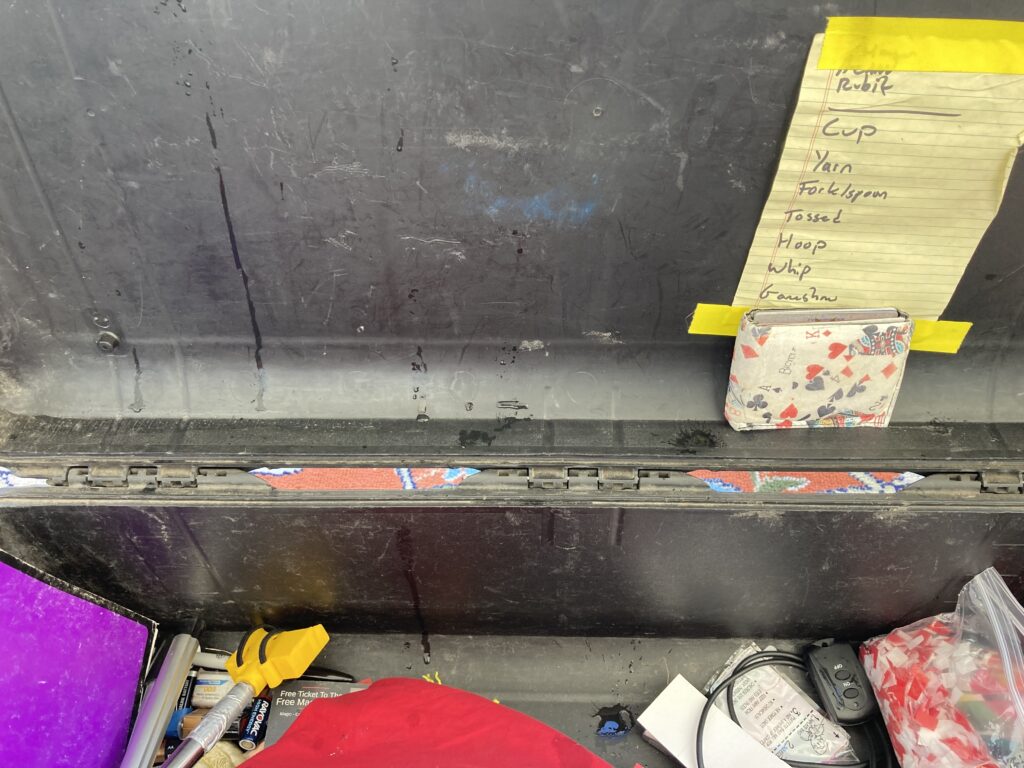
My current 40-45 minute show fits into the black case, which is briefcase sized.
The yellow case is my audio gear.
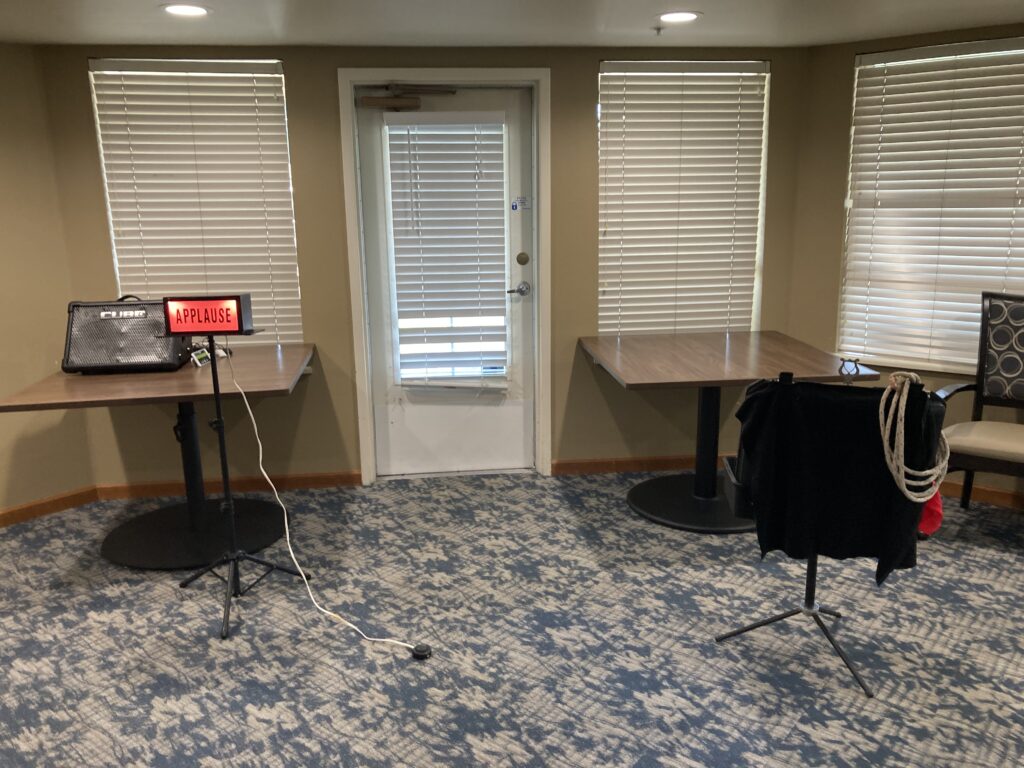
The show was put together to visually fill a little bit of space and not look like I’m just using flat handheld props that were selected because they easily fit into a briefcase.
The nice thing about this show is that it can be done using people from the audience, and it can also be done “no contact”, so no one from the audience joins me on the stage or handles any props.
Aside from any COVID restrictions, the no contact option is handy as sometimes you’ll have a less mobile group and it’s not easy to have people join you on stage. Having them interact from their seats is good, however if you physically go to them in the back row, a lot of the audience can’t see what’s happening. When you talk to them from the stage and the magic still happens onstage the whole audience can see what’s going on.
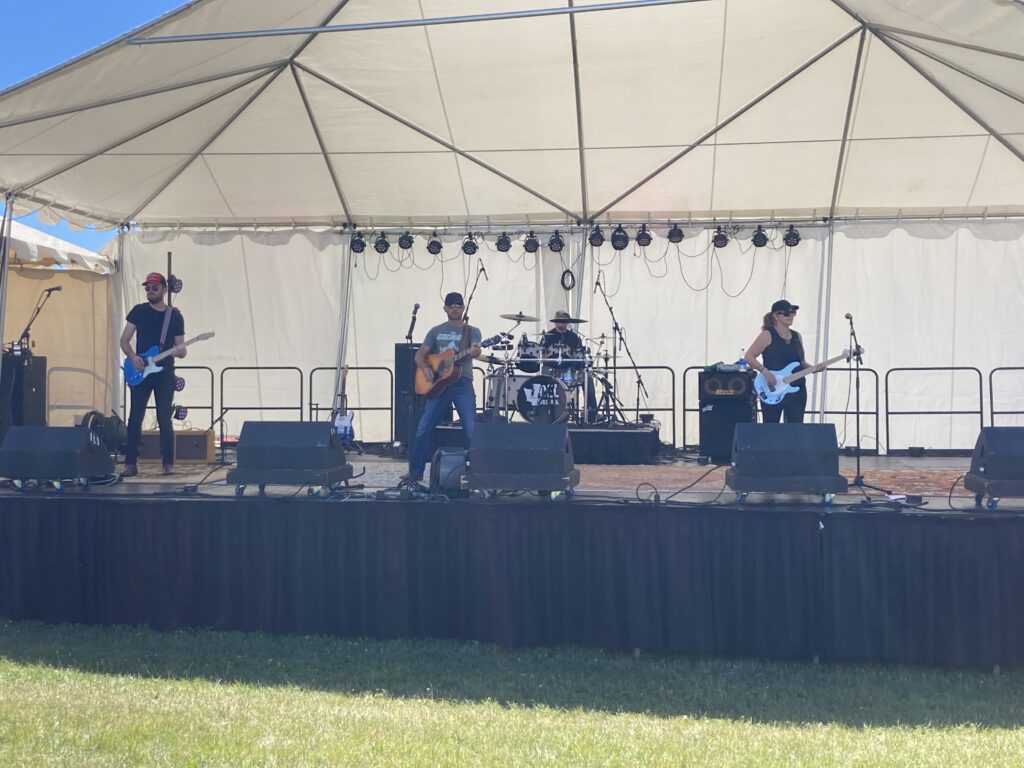
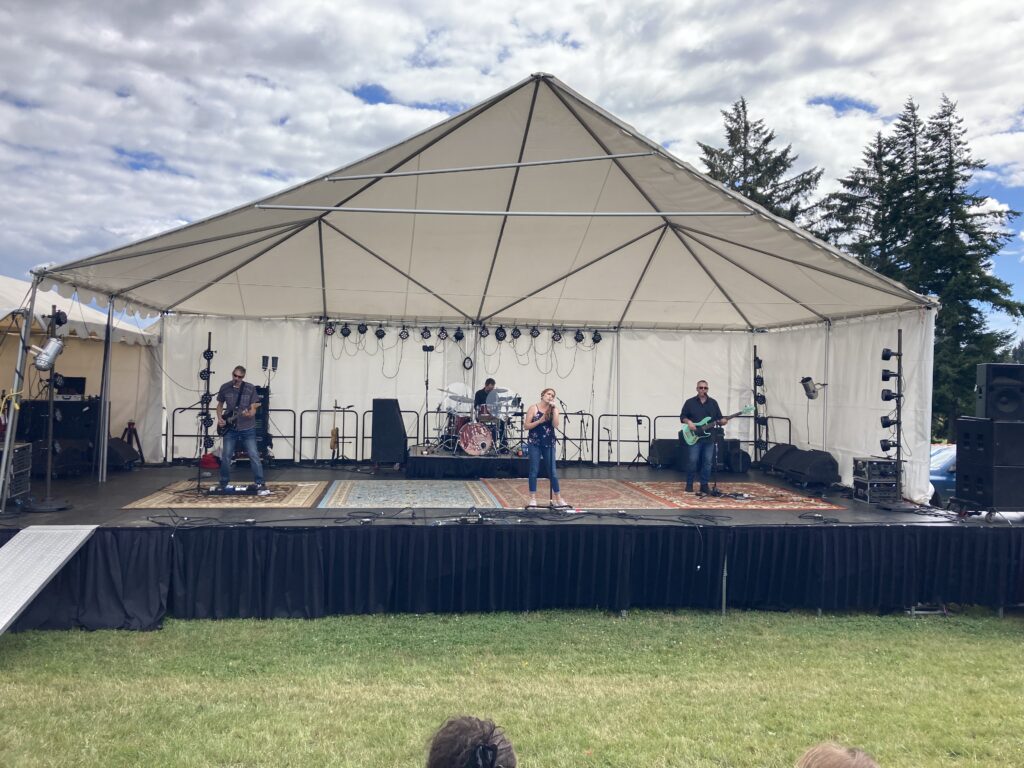
Normally when I perform on a stage, I have the monitors moved, so the front of the stage is clear. That gives me more real estate to perform on at the front of the stage and it also removes a physical barrier between the audience and me. Last week while performing at a fair I was watching the bands that I shared the stage with and realized how much better the stage looks without the monitors.
Here’s a band with the monitors on stage:
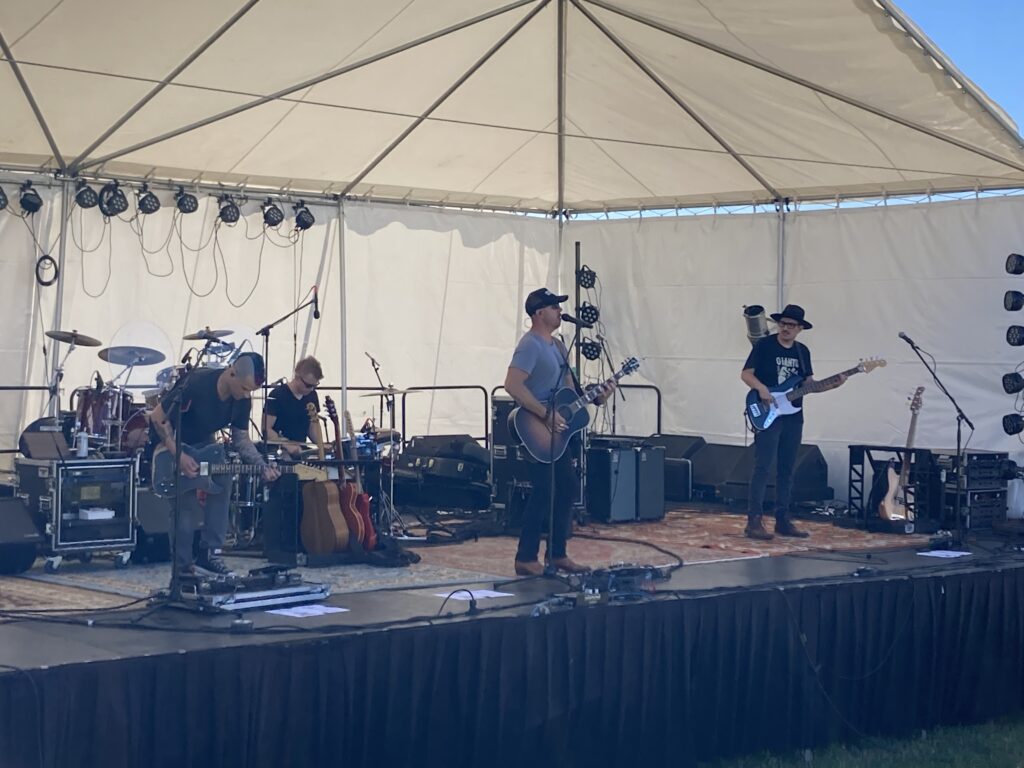
I think audiences are used to seeing monitors onstage. However once you remove them, it looks soo much cleaner!
The two bands without monitors were using “in ears” monitors. I don’t think they are right for most magic acts but using them to eliminate the monitors for a band looks great. It also gives the performer a more powerful position onstage with no physical barriers between them and the audience.
If your stage has monitors, you can ask to have them moved…if you don’t need them.
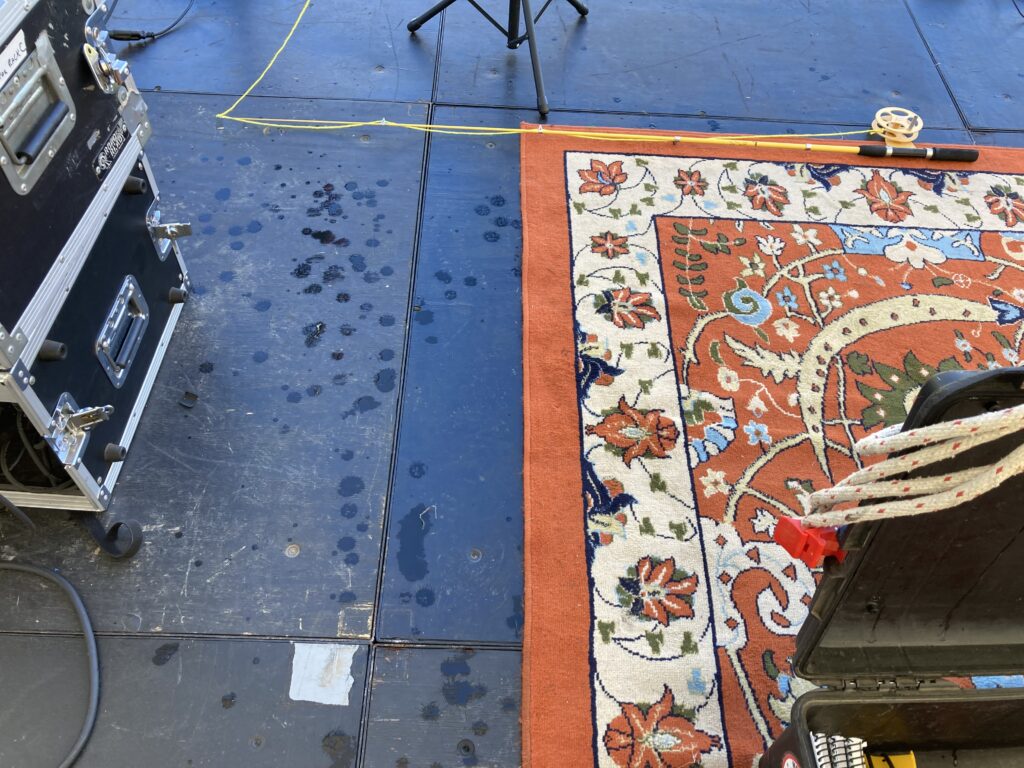
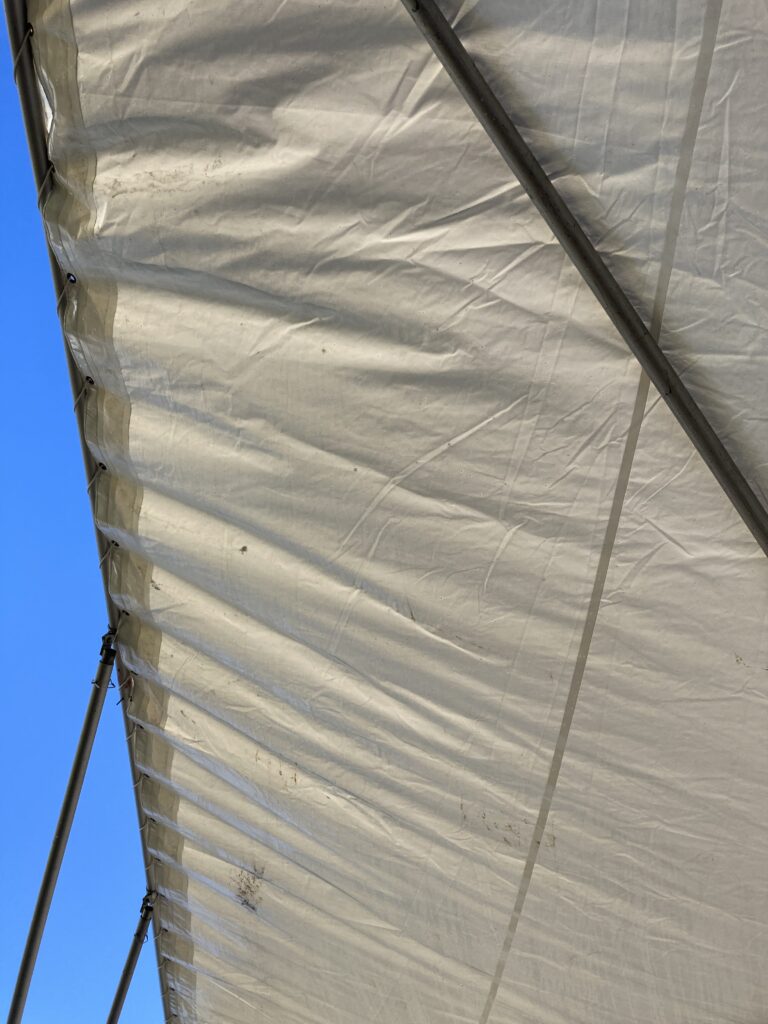
Performing as many shows as I do around the country at all sorts of different venues you encounter a lot of things. I just had a new one, it was a gorgeous sunny morning, but it was raining onstage!
What had happened was it was really dewey this morning and moisture had collected on the underside of the stage’s canopy. The top edge of the canopy wasn’t pulled very tight, so it had little valleys the water could pool on and form droplets that fell down on me during during my show.
It was the strangest thing because the audience really couldn’t see this, so it was something that I had to deal with. I did mention it to the audience, so that they were aware of it. That was it didn’t look strange when I pulled out wet props!
I did have to move things around to keep more water sensitive things dry. For example my notebooks (svenpads) I put another prop over to keep them dry.
This is a case of be ready for anything that can happen when performing. You never know what you’ll be walking into!
After hitting the snooze button three times, I managed to make it to the venue just in time for the stage contests to begin at 8am!
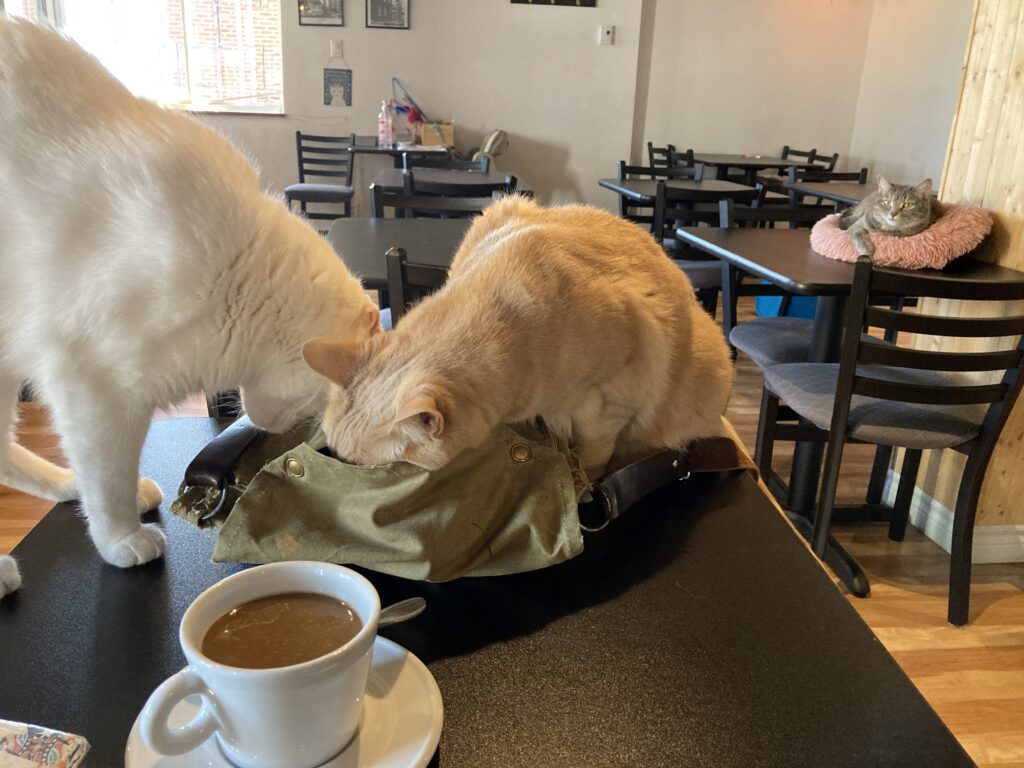
About halfway through the stage contest, I had a family emergency (everyone is OK) at home in Seattle happen and I had to step away to deal with it. I need to find a quiet spot to do some paper work and make some calls, so I walked a couple of blocks and found a great coffee shop, Café félin Chats-Nous!
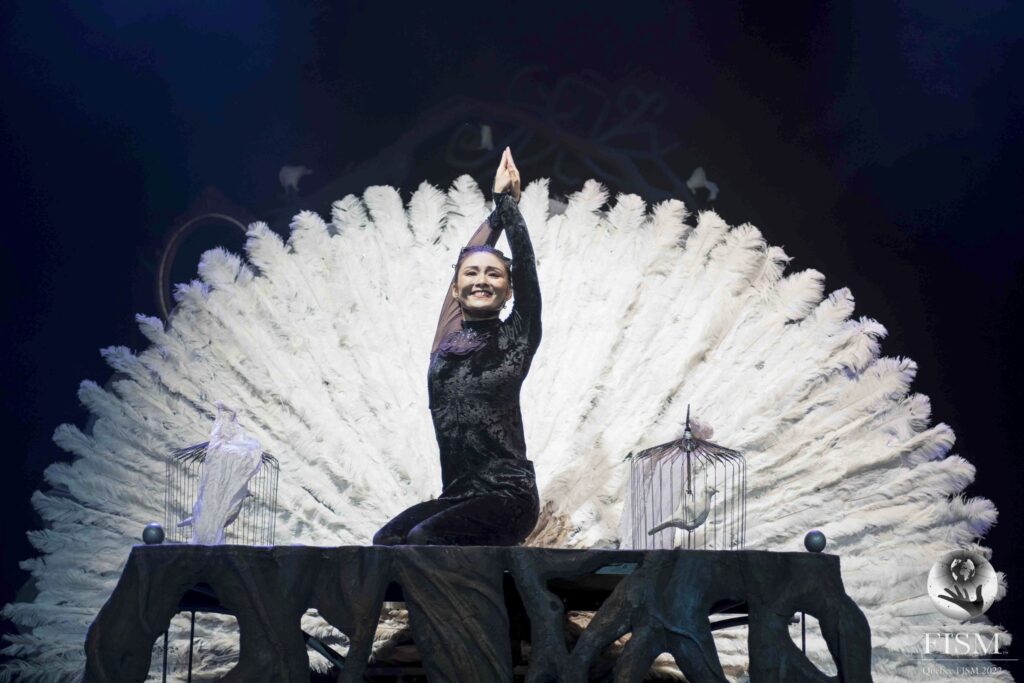
Having cats do cat stuff while I talked to insurance companies definitely reduces my stress, and after little while I headed back to the stage competition, just in time to catch the end of Ding Yang’s incredible act!
official FISM photo
I’d heard a lot about her act, and it was cool to see her do dove productions with her feet! I wish I was able to see the whole thing. Unfortunately she didn’t get first place in her category, so I didn’t get to see her perform at the Winner’s Gala.
It was a quick bite to eat (aka another egg salad sandwich) and off to the close up contest. It was at the contest today that I had a major revelation. I had noticed that there was a lot of flashing on some technical and not so technical sleight of hand moves. I realized that the judges were about 4 feet lower than the camera was. In theory the close up magic contestants were playing to the judges eye, not the camera’s eye. The different points of view are probably why the audience was seeing soo much flashing, where (hopefully) the judges weren’t.
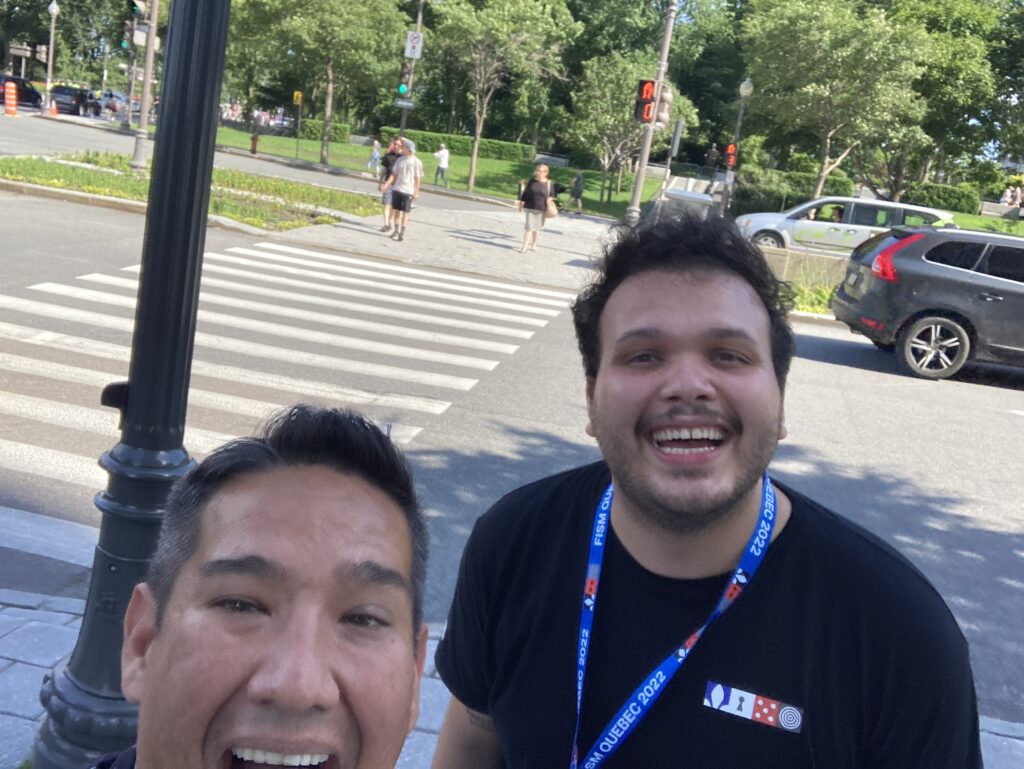
After the contest I got a text from Chris Hanowell who wanted to get some poutine while in Canada, so we ran up the block for the Canadian dish!
Louie Foxx and Chris Hanowell
We also decided it was time for us to see the pope, as he’s been the talk of Quebec! You’d think having 2,000 magicians in town would be, but we got overshadowed by The Holy See. We decided there was enough gap in the schedule to walk up the hill to try to get a pope peek. Unfortunately it wasn’t in the cards, and when we arrived, everyone was leaving and we had missed him by about 15 minutes!
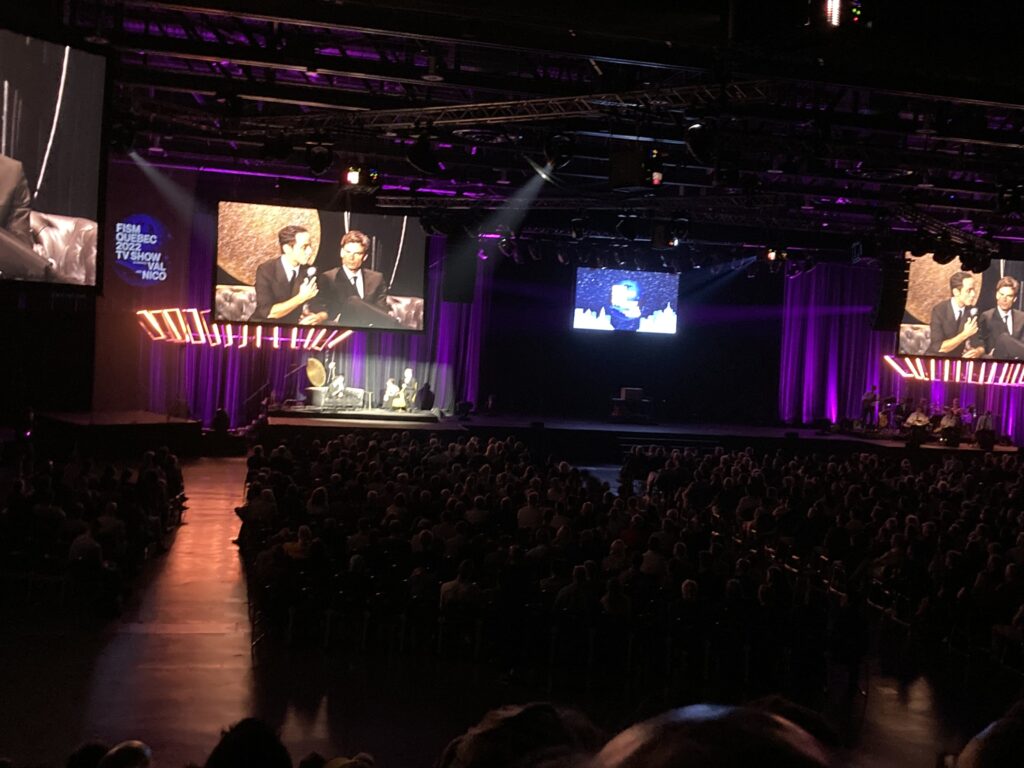
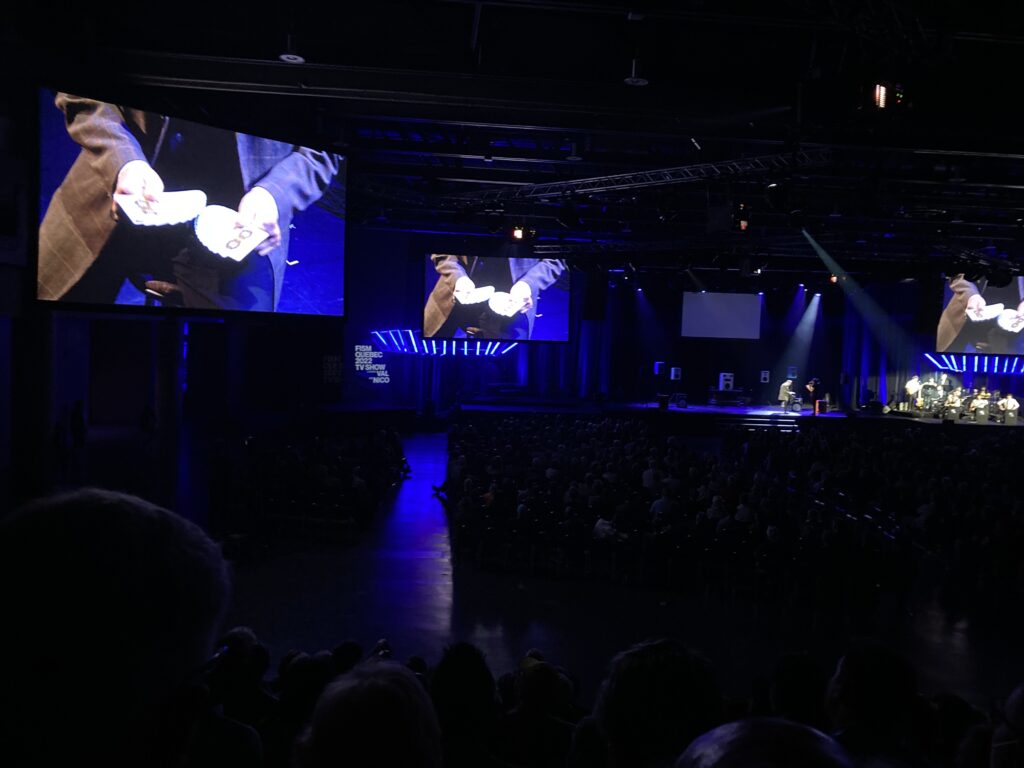
The evening gala was getting ready to start, and this was the FISM TV SHOW aka a magic show pretending to be a television show.
They had a duo as a host and their MC bits and chemistry weren’t very good, but this is the show were most of us learned that Topas has a couple of music albums in Germany (you can find them on spotify), and were introduced to his earworm “one more” during his stage act where he produced speakers and finally a lady! The FISM TV SHOW ended with Shawn Farquhar doing his Shape of My Heart routine to a live band!
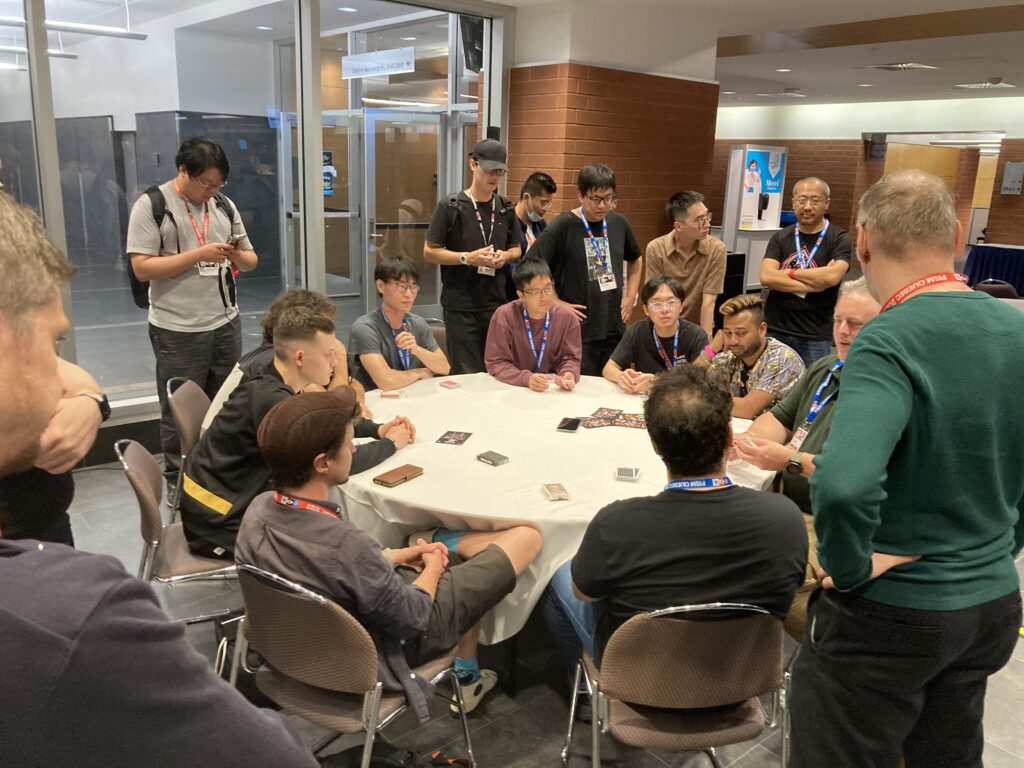
After the show, I had enough energy to hand out in the Jam Room, which was a lobby like area in the convention center.
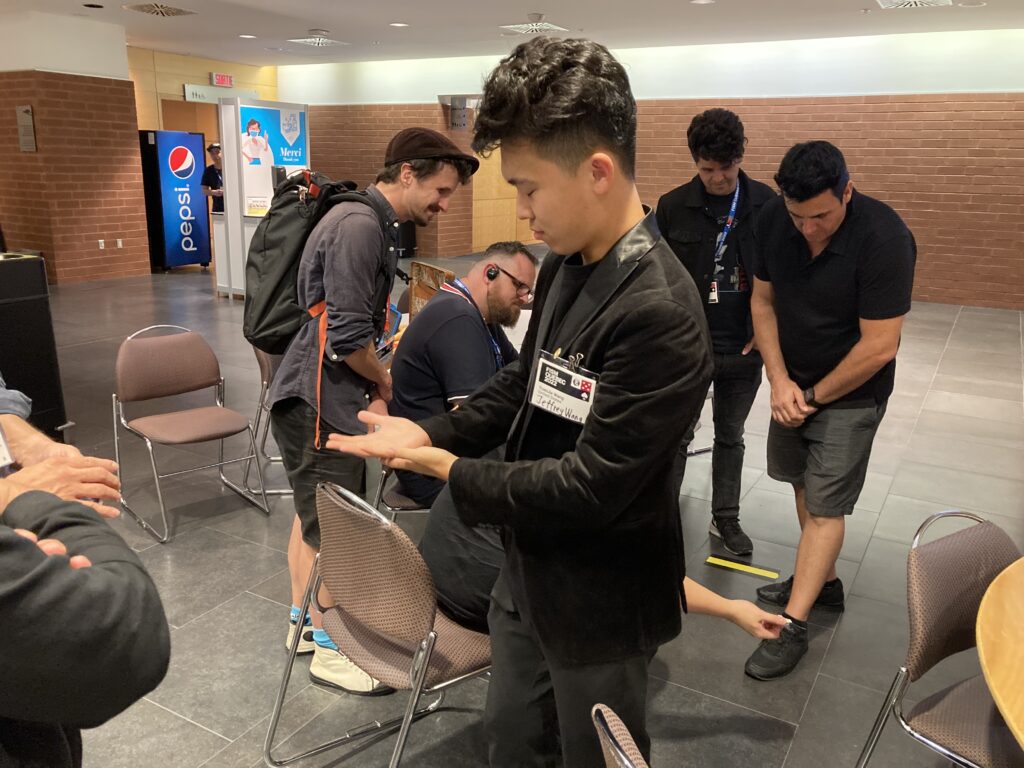
And I finally got to see Jeffrey Wong do the coin work that my buddy Clive wouldn’t shut up about.
Jeffery didn’t disappoint! He was doing some very technical stuff and he did it very well!! Before I knew it, it was 4am and it was way past my bedtime, so I took the walk back to my room, as tomorrow is another early contest morning! -Louie
Last week I bought some rope on a whim and started playing with cut and restored rope in my show. I used to do this a long time ago when I was starting out in comedy clubs. Technically my routine was a mix of Steve Bedwell‘s and Michael Finney‘s routines. It worked well at the time and served its purpose, but I really haven’t done cut and restored rope in the show in a 15+ years.
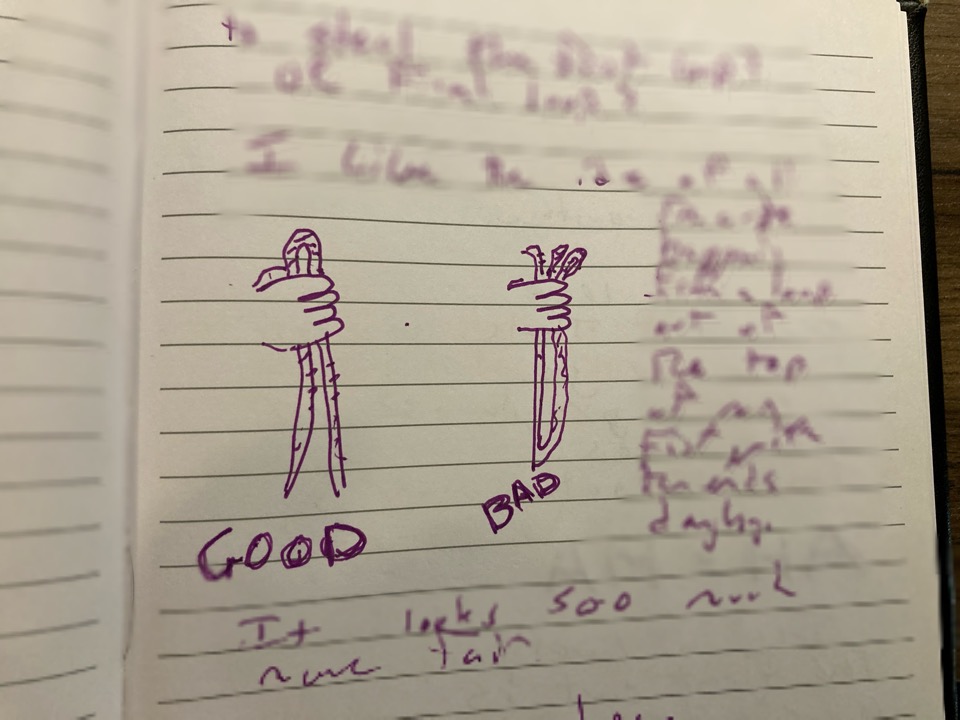
I’m having fun with the trick, and pretty much doing it how I used to do it. However, for me to do it in the show, I need to contribute something to the trick. One thing I did today was start to come up with conditions for the routine. The first condition is that I want all of the cuts to happen with the middle of the rope sticking out of the hand and the ends dangling:
I think this is a much more natural and fairer looking way to hold the rope than the standard method where you switch the end for the middle.
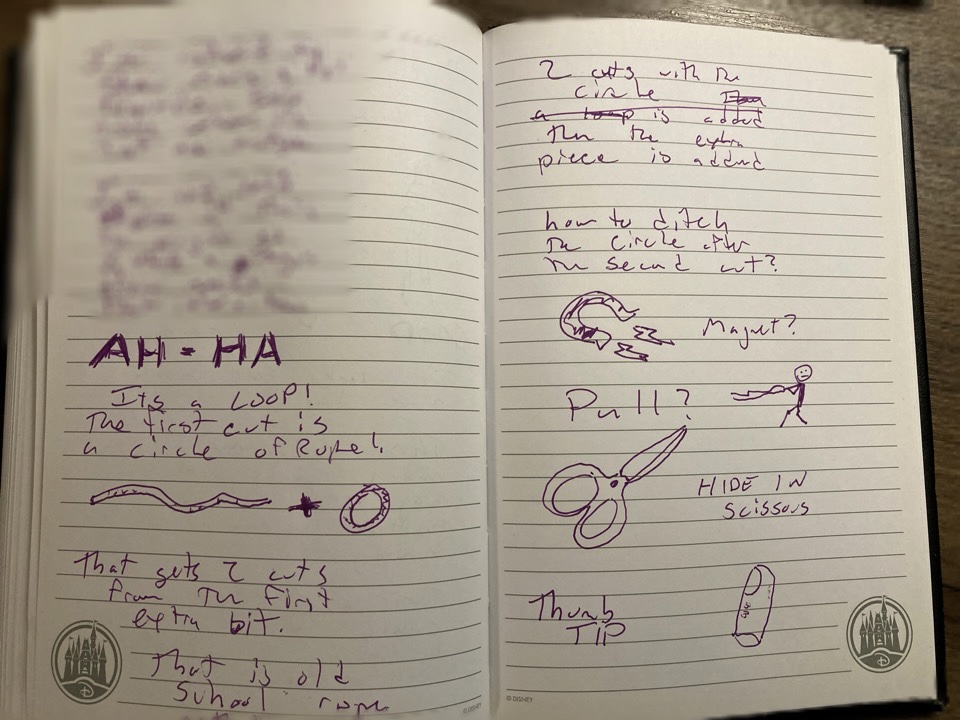
Then with further writing I hit on another idea (from the past!)
Using a circle of rope instead of an extra length of rope will allow me to get two cuts without having to add any rope and both cuts can be done from the desired hand position!
The next challenge is figuring out how to get rid of the circle of rope once it’s been cut twice and is two pieces of rope. Once I solve that, I need to start doing some writing on what to say!
-Louie
PS. You’ll notice I have drawing in my notebook. I’m using drawing more and more. I highly recommend getting the book Sketch Notes, it really helped me learn to add drawings.
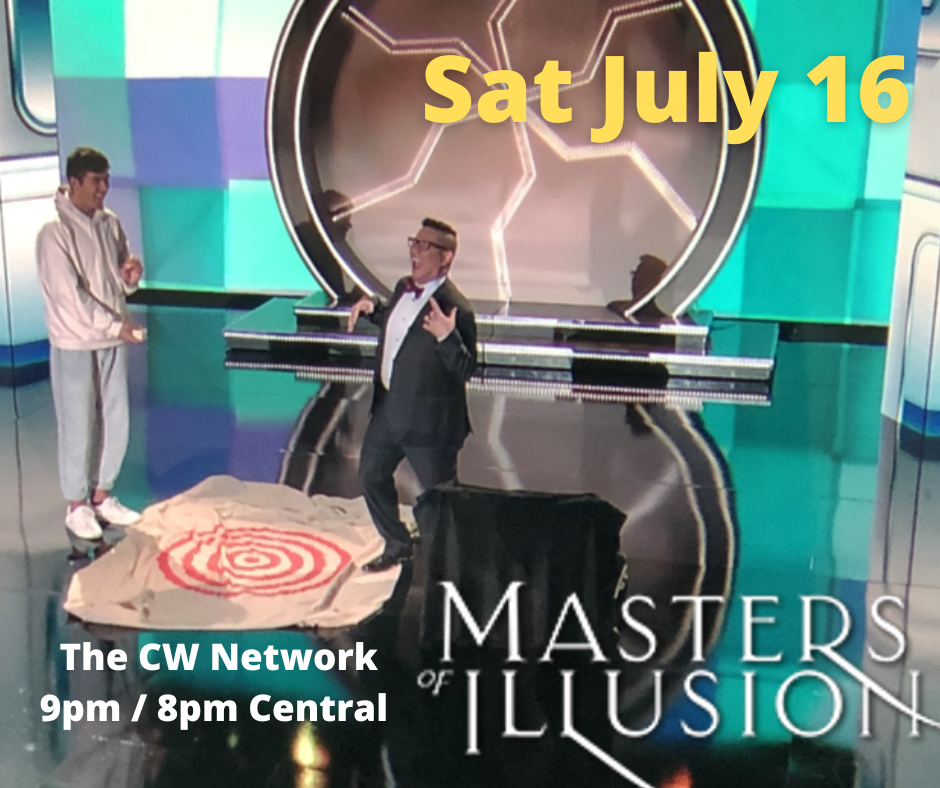
My segment on Masters of Illusion aired last night, but I didn’t get to see it until this morning as we don’t have cable anymore. It was a good segment and that got me about 2 1/2 minutes of airtime, which is great!
If you missed it, here it is:
The normal routine runs 6-8 minutes, so there’s a lot of stuff that got cut out of the routine to tighten it up for TV.
Here’s a bit of the story behind this routine:
Way back in 2019 I went to Holbrook AZ to perform my magic show at the Navajo County Fair. My bags were overweight, so I left my cards at home, thinking I could get them in Holbrook. When I got there I couldn’t find playing cards anywhere in town! I wandered the stores looking for something “card like” that I could use instead of cards. A box of crackers caught my eye. Over the week I developed a card trick that used crackers instead of cards!
You can also search the tag: Cracker on this blog for more info about the routine.
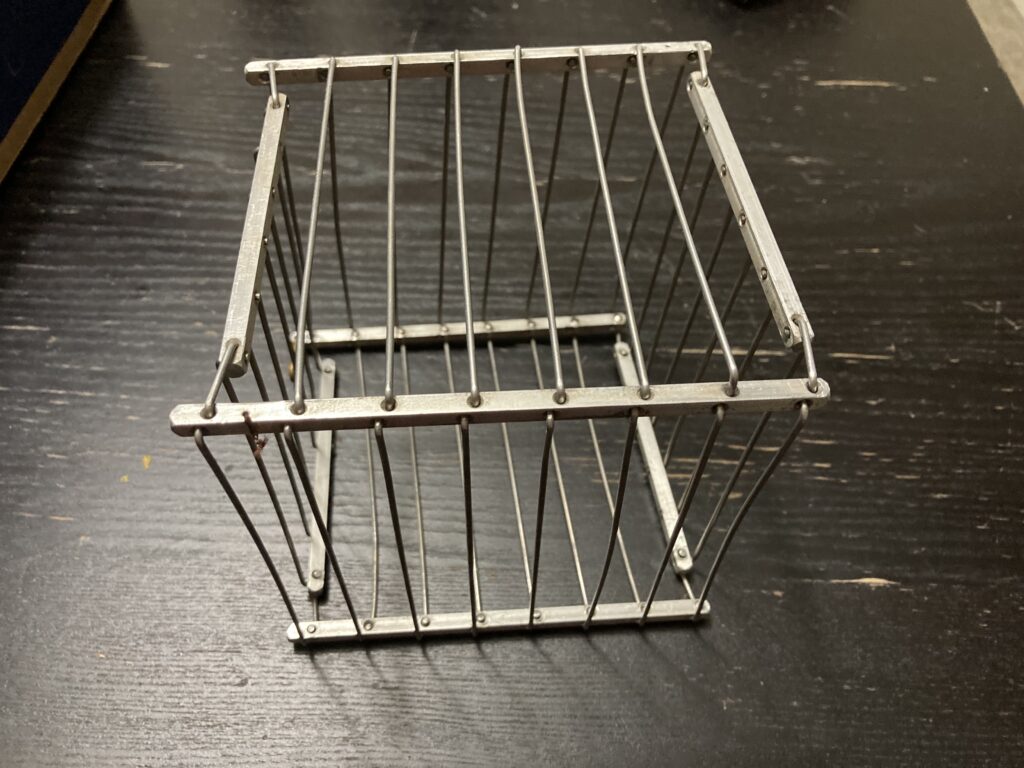
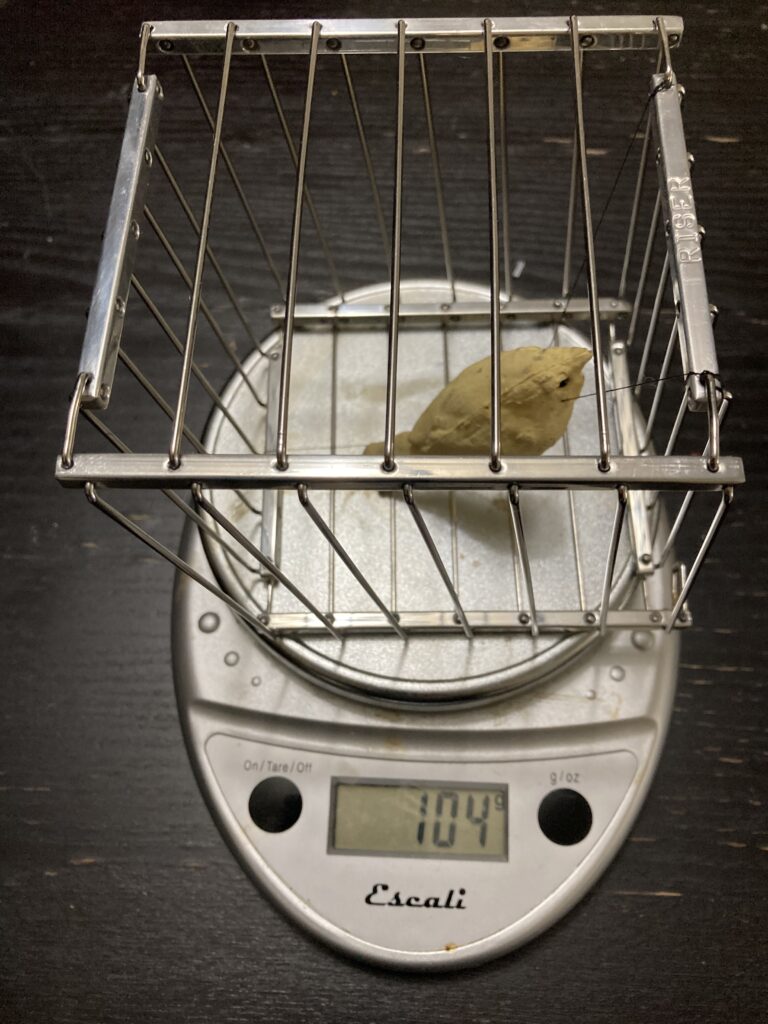
I found a Vanishing Birdcage on eBay that I don’t have in my collection. I don’t know who made it.
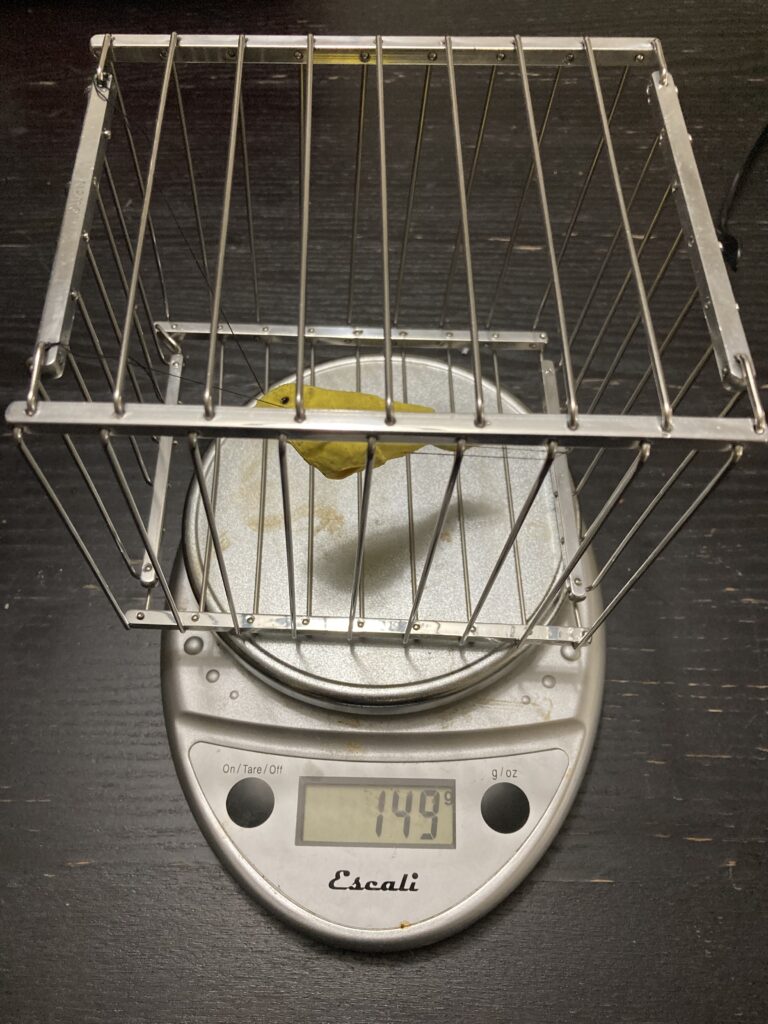
This one is interesting because of its dimensions. Its 5 x 5 x 5 inches, so a square. For perspective, my Owen Vanishing Birdcage is 5 3/4 x 5 x 5, so a rectangle.
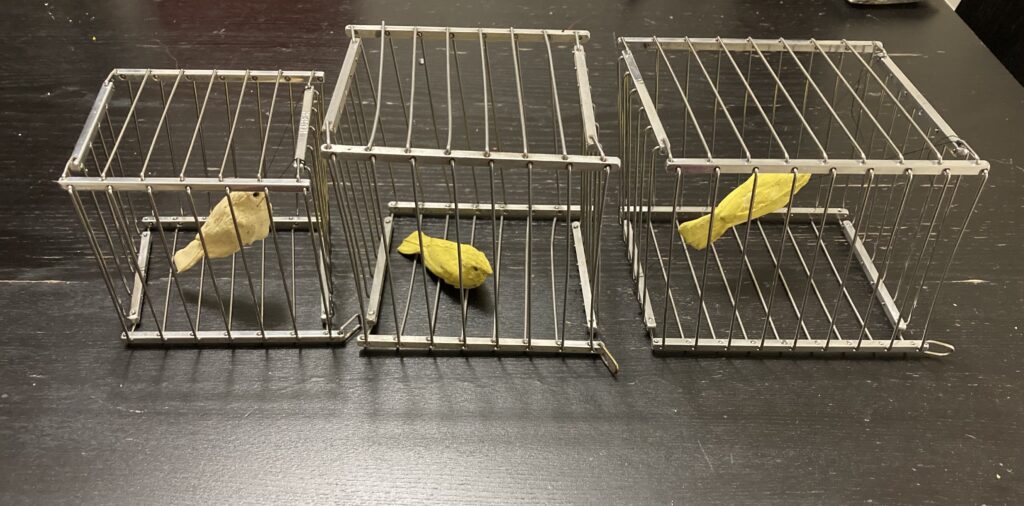
Left to Right: Baby Lindy – Unknown Maker – Owens Challenge Cage
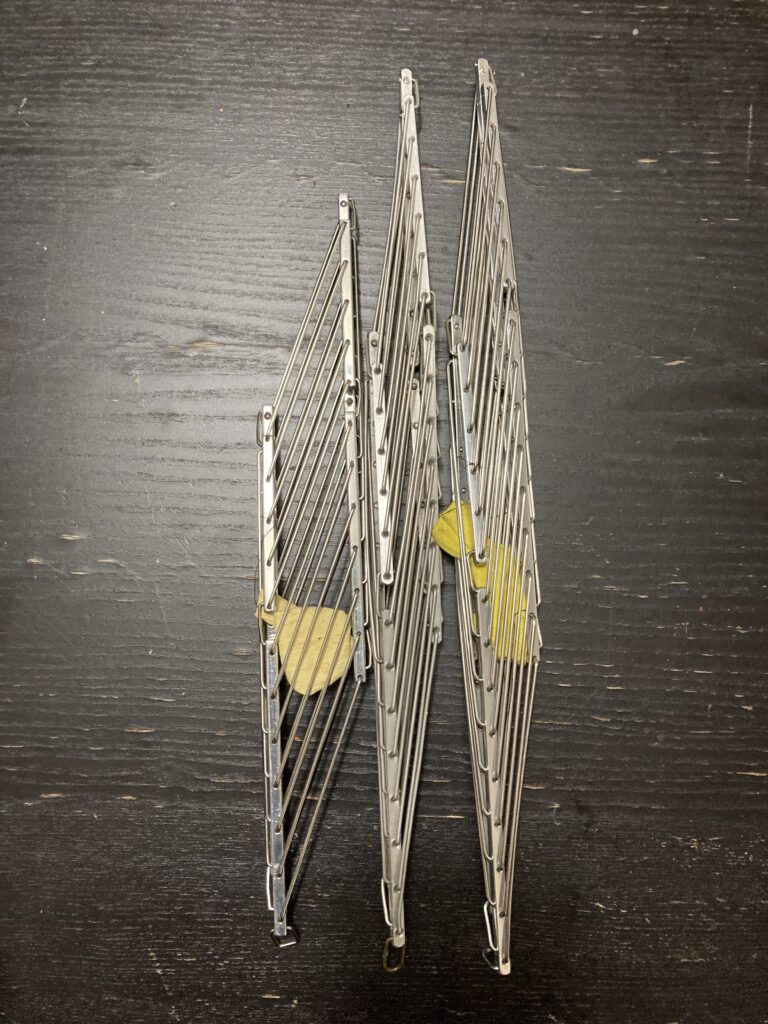
What I find strange is the square dimensions make cage look smaller and not really give you any advantage as the cage collapsed is virtually the same size as the Owen cage.
Left to Right: Baby Lindy – Unknown Maker – Owens Challenge Cage
The amount of bulk reduced in your sleeve after the vanish is negligible, and it’s only one bar shorter than an Owen Challenge Cage.
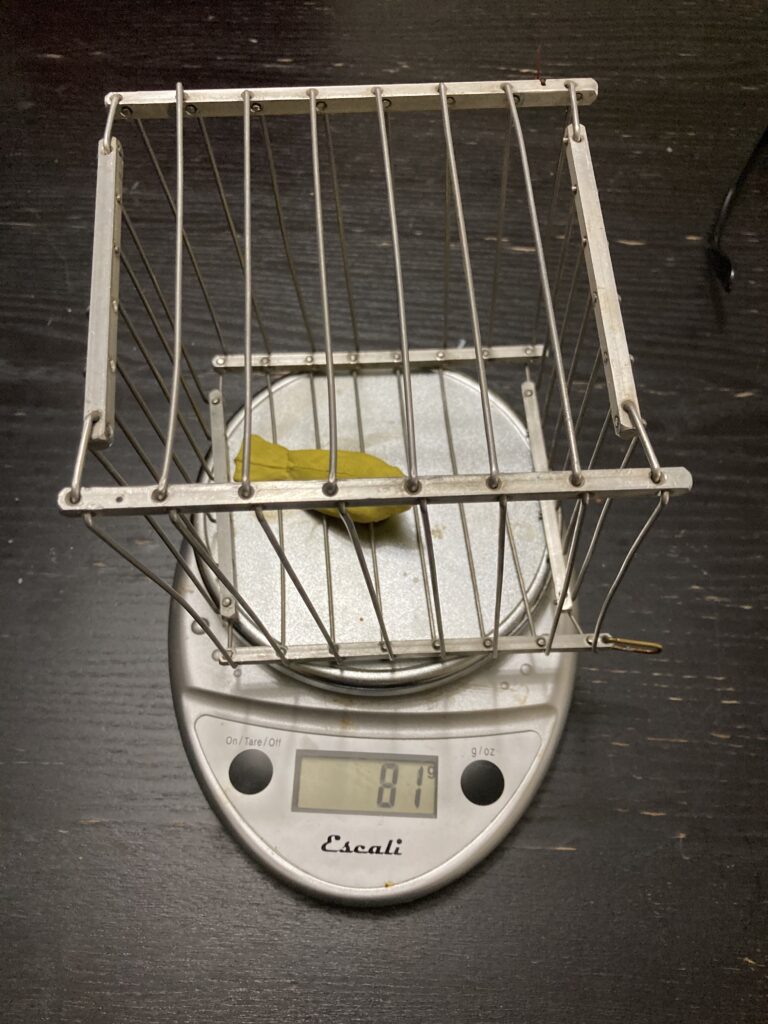
What is interesting is the weight of the cage. I compared it to my Baby Lindy and Owen cage and this cage is 20% lighter than the Riser/Summers Baby Lindy Vanishing Birdcage and about 2/3’s the weight of the Owens Challenge Cage.
New Cage – Maker Unknown
Summers/Riser Baby Lindy
Owen Challenge Cage
The lighter weight is the only advantage for this cage, however I can’t imagine why they wouldn’t have made it a bit wider or shorten it’s depth to give it that rectangle shape to reduce bulk.
I’m glad to have it in my vanishing birdcage collection! -Louie
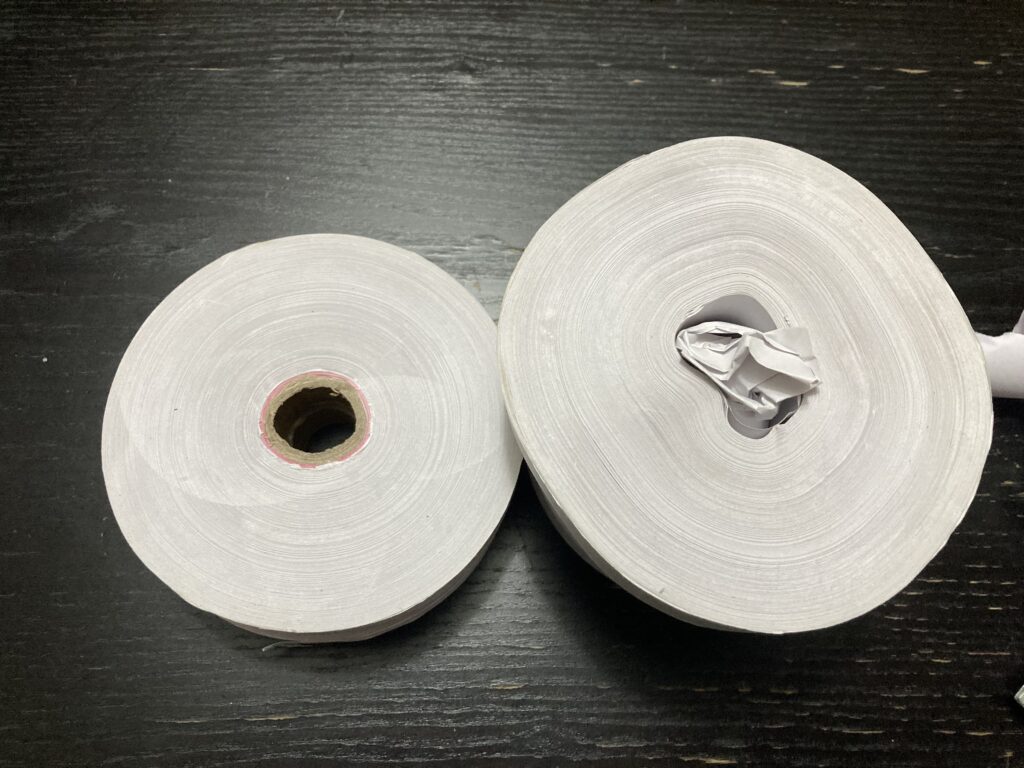
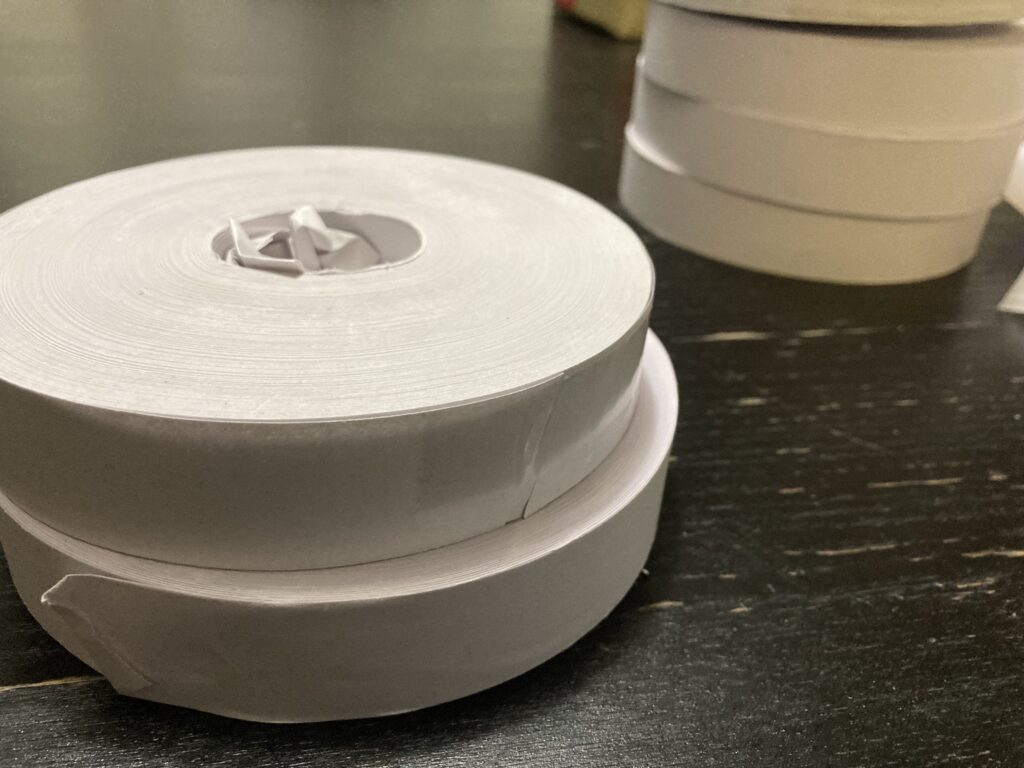
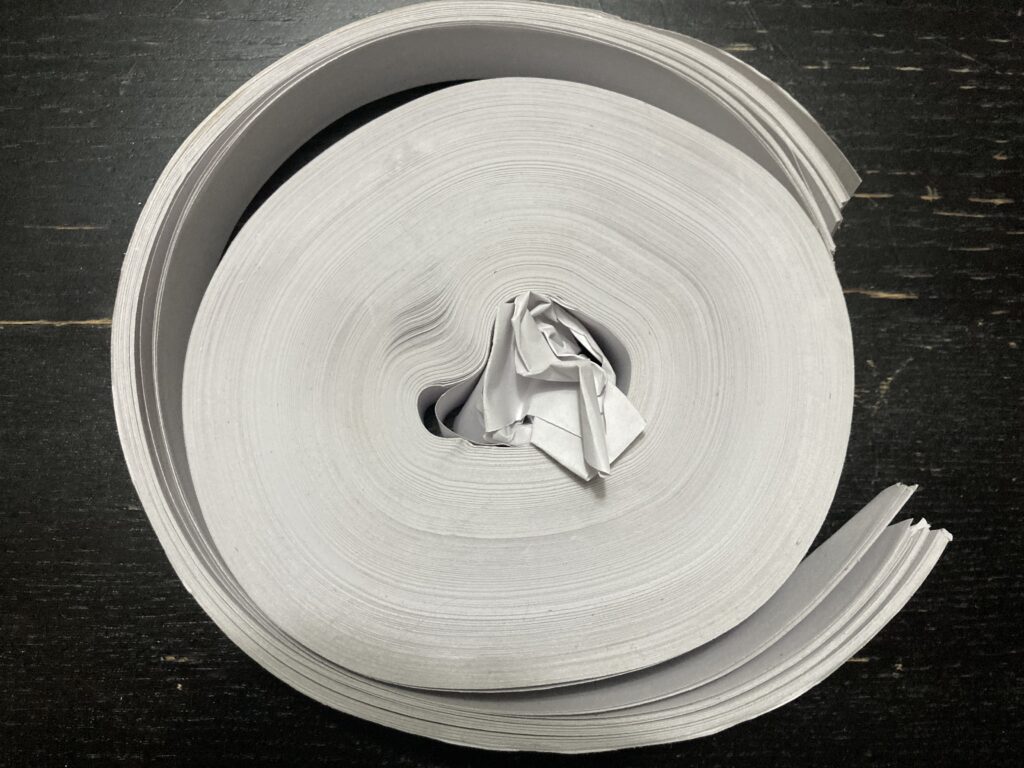
I’ve got a few summer camp shows this week. Yesterday I mentioned that I use a Hat Coil in my summer camp show.
Last night I was getting them ready, so here’s how I prep them. I start by removing the inner brown cardboard from the hat coil. Then I take a bit of the middle and I crumple it into a ball. That ball then gets shoved into the middle of the hat coil. That makes it easier to pull out when I’m ready to produce it.
Next I cut off some of the outer layer and throw it away. I use tape to secure the end. The reason that I do that is because the hat coil slows down a lot towards the end and the last bit just takes forever. By cutting off a little bit is makes it a little punchier:
It takes about 10 minutes to do 7 -10 of them, so it’s pretty quick.
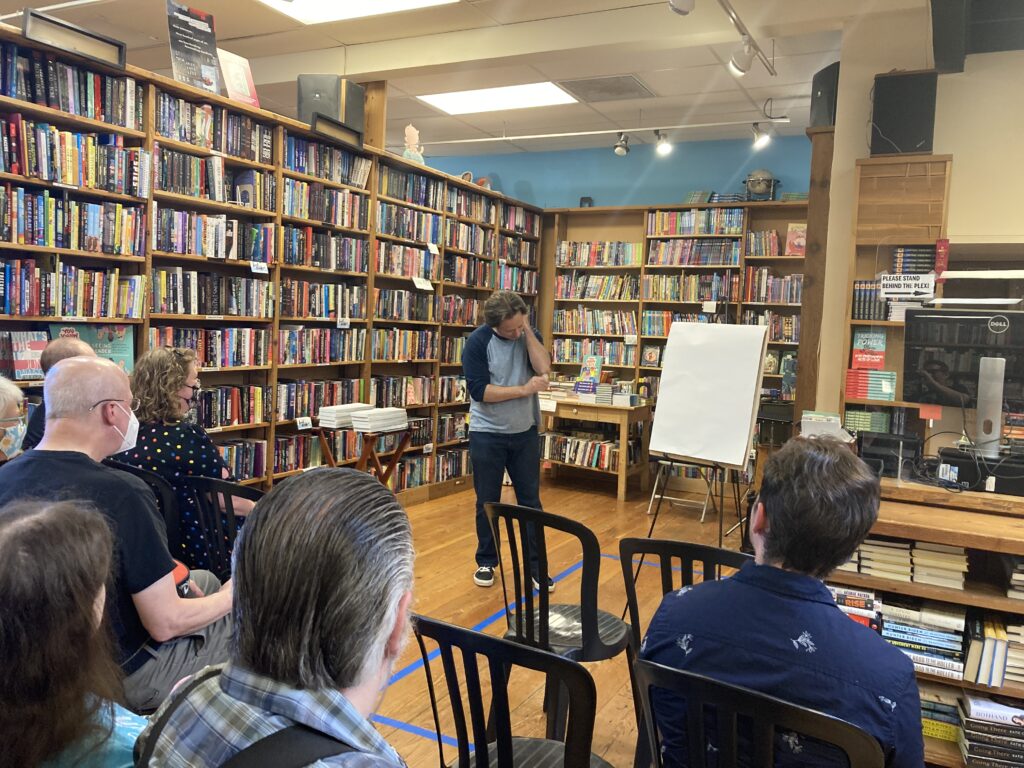
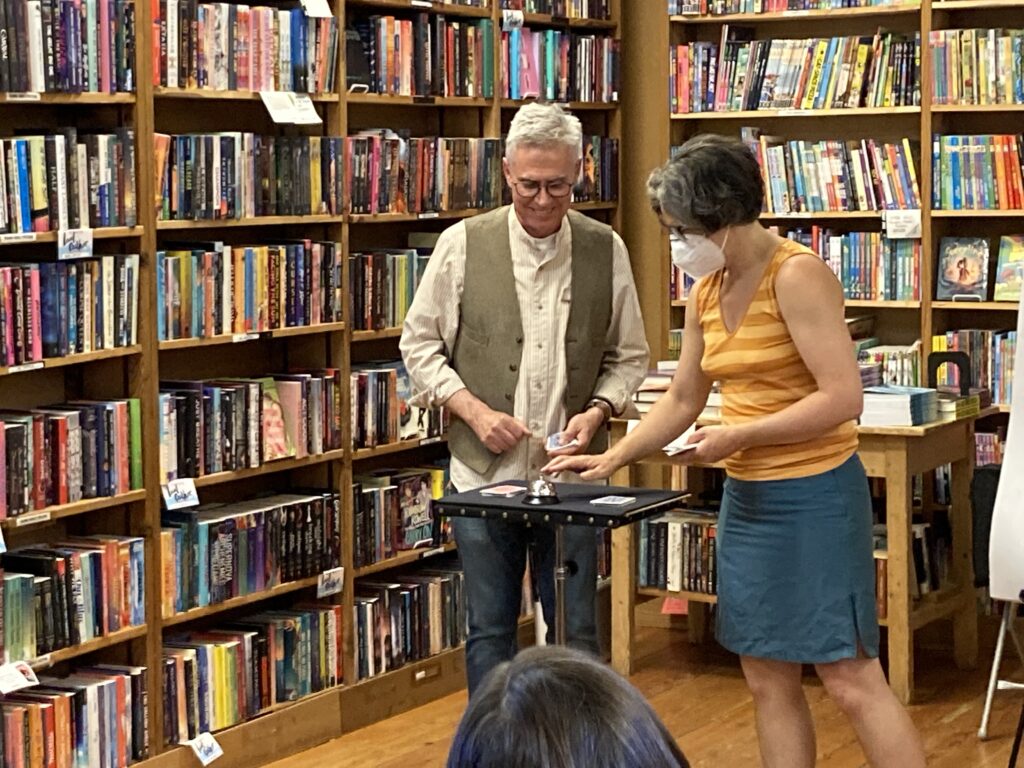
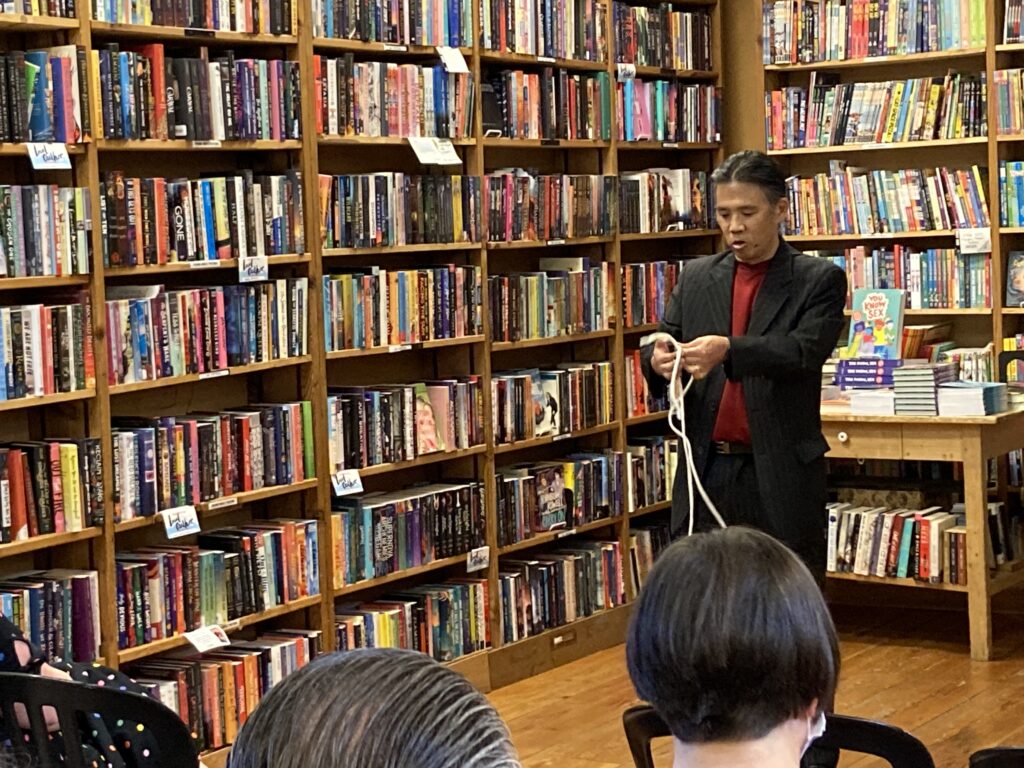
In the Seattle area we have a show called Magic Mondays. This is essentially a magic open mic, and a great resource for local magicians to work on material, or just have a chance to perform in front of a real audience. This show has been running for years and has a built in fan base, and the audience came back when the show returned after 2 years off during the pandemic.
Last night we got to see Jim Earnshaw perform some coin magic, then David Regal’s Will The Socks Match. I really liked the sock trick!
Next we had Frederick Turner doing a “do as I do” style card trick, with a bell as the transition prop. I really liked the used of the bell and it was great signal at the end of the trick.
In the show was a new to the Seattle area performer, David Hirata. He did some great rope magic, card magic and was a lot of fun to watch!
Finally we had Master Payne who did his fabulous coin in bottle routine. He’s going to be doing a presentation at FISM in a couple of weeks and will be doing this routine, so he was practicing it.
Last night’s show was solid show and best of all, it’s FREE to the audience! This is a great show to catch is you’re in the Seattle area on the second Monday of the month at Third Place Books (Ravenna). -Louie